As fall turns to winter here in southwestern Pennsylvania, even a few overlooked maintenance items can lead to costly surprises. From frozen pipes to failing furnaces, now is the time to inspect and prepare your home’s major systems before the first real cold snap hits.
Here’s Hill Property Inspections’ professional pre-winter checklist—drawn from years of inspecting homes across Cambria, Somerset, Westmoreland, Blair, Indiana, Bedford and surrounding Counties.
1. Roof & Attic: Stop Leaks Before They Start
Your roof is your first line of defense against snow and ice.
• Inspect shingles for curling, cracking, or missing pieces—especially near valleys and chimneys.
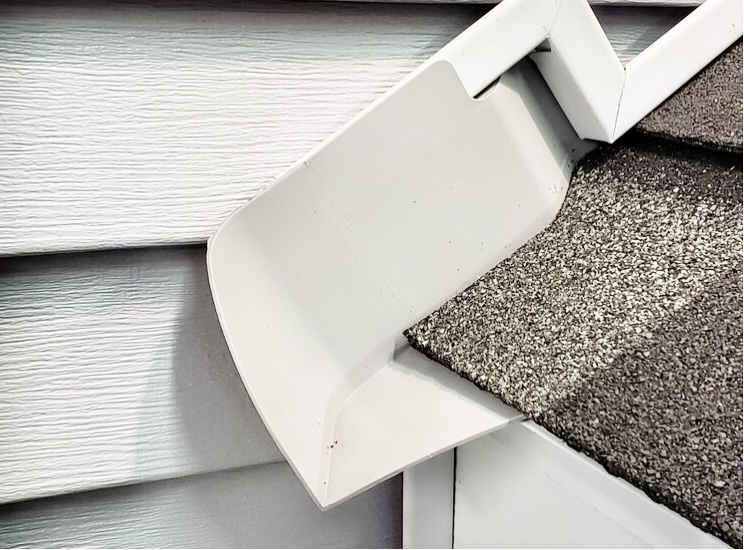
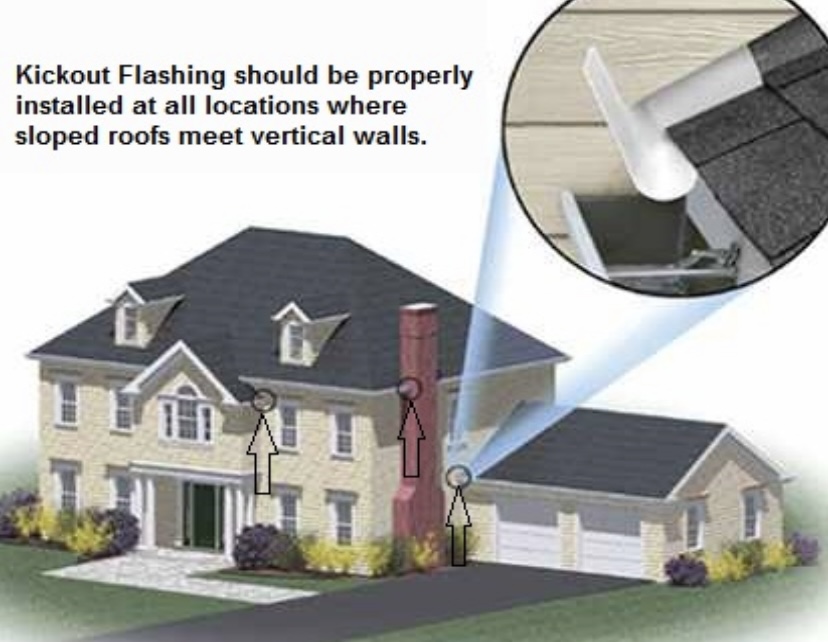
• Check flashing around vents, skylights, and penetrations. Even small gaps can lead to leaks when ice accumulates.
• Look inside the attic for dark stains, damp insulation, or visible daylight—these are red flags for air leaks or roof damage.
• Verify ventilation. Proper airflow through soffit and ridge vents helps prevent condensation and ice damming.
Pro Tip: If you can see frost or moisture on attic nails, your ventilation or insulation is out of balance.
2. Gutters & Downspouts: Direct Water Away
Clogged gutters can create ice dams that force melting snow under your roof covering.
• Clear all leaves and debris. Flush the system with water to ensure flow.
• Confirm downspout extensions discharge at least 4–6 feet from the foundation.
• Inspect grading. Soil should slope away from the house—at least 6 inches over the first 10 feet.
These small adjustments prevent foundation seepage and protect basement walls through the wet freeze-thaw season.
3. HVAC System: Clean, Service, and Test
Cold weather exposes weak heating systems fast.
• Replace furnace filters and ensure registers are open and unobstructed.
• Have your furnace or boiler serviced by a qualified technician. Annual cleaning keeps efficiency high and reduces carbon monoxide risk.
• Test the thermostat and inspect vent connections for rust or gaps.
• Consider an infrared scan (available with Hill Property Inspections) to check for air leakage and uneven heat distribution.
If your system is older, now’s also the time to budget for an upgrade or backup source.
4. Plumbing & Water Systems: Prevent Freezing
Frozen pipes are among the most common—and costly—winter emergencies.
• Disconnect garden hoses and drain exterior faucets.
• Insulate exposed pipes in unheated crawlspaces, basements, or garages.
• Locate your main water shut-off valve and make sure every adult in the household knows how to use it.
• If you have a sump pump, test it. Pour water into the basin and confirm automatic operation.
For homes on private wells, ensure the well pit or pressure tank area is insulated and protected from drafts.
5. Safety Devices: Test and Replace Batteries
• Smoke and CO detectors: test each unit and replace batteries.
• Fire extinguishers: ensure at least one is rated for A-B-C use and stored where it’s visible and easy to access.
• Dryer vent: clean out lint buildup to reduce fire risk.
6. Exterior & Entry Points: Keep the Cold Out
• Seal gaps around doors and windows with weatherstripping or caulk.
• Inspect exterior lighting for proper operation—shorter days require dependable fixtures.
• Check sidewalks and handrails for damage before freeze events make repairs difficult.
Final Thoughts
A pre-winter inspection is more than a checklist—it’s preventive insurance. By tackling these simple tasks now, you protect your roof, foundation, and comfort all season long.
If you’d rather have a certified professional evaluate these systems for you, Hill Property Inspections offers comprehensive pre-winter assessments, infrared scans, and maintenance inspectionsthroughout southwestern Pennsylvania.
Schedule your winter-readiness inspection today:
📞 1-833-HILL-PRO
Hill Property Inspections, LLC is a full-service residential and commercial inspection firm based in the Johnstown, PA area.